Front door phobia.

One of the other areas that I struggled with in the new house was the front door color.  I know I posted design boards a ways back with different thoughts and plans so I wanted to give you the process and finished look!

Our house is a dark gray.  Which I LOVE.  Our gutters are a dark brown.  Which I didn’t love.. but have actually grown on me.  So finding a “non expected” front door color was a bit of a challenge.

I toyed with lots of different thoughts.  I considered coral,  brown, yellow, red, powder blue and even removing the front door and rehanging a natural finish option.  (For the record the last option would have been my first choice but I am TRYING to be budget conscious!)

While good options, none seemed to “fit.”  I wanted something that would carry to the inside and with all of my white walls and minimal color the color palate for the front door didn’t seem to match. I also didn’t want something expected.  Red was so obvious with the dark gray color palate and call me a true Auburn girl but I just don’t do red well.

After weeks of consideration and even a Facebook/instagram poll I decided that I would either go with a coral or pale, buttery yellow and headed to the paint store.  Somewhere in my pickup of paint chips (which I carried on top of my pillows to try to get a better “feel” for the color) I also grabbed a mint green and a lime green.  Pretty unexpected for me.

After much debate and photo sharing, I decided to go outside of the expected (and outside of my comfort zone) and chose the mint green. Martha Stewart Salvia was the winner (ding! ding!ding!!!)

Once home, the red/orange front door from “The Gray House past” quickly disappeared under multiple coats of a bonding primer (my new favorite painting tool.) Once the new mint green went on the door, I realized that my decision was a good one.  After the new glazed white planters, ferns and accents of yellow, navy and brown were in place…I realized I was in love with my front porch.

The door color took this house from the expected “craftsman” that you see in most neotraditional neighborhoods to a house that gave me the feeling it belongs in The Hamptons. It totally changed the “feel” of our house and I am really digging. it. It also carries well into the interior of our house and I can honestly say that I feel like The Gray House is finally our home.

So what does your front door mean to your house?  Everything.


IMG_7927 IMG_7939 IMG_7936 IMG_7937 IMG_7933 IMG_7928

A kitchen worthy of being photographed

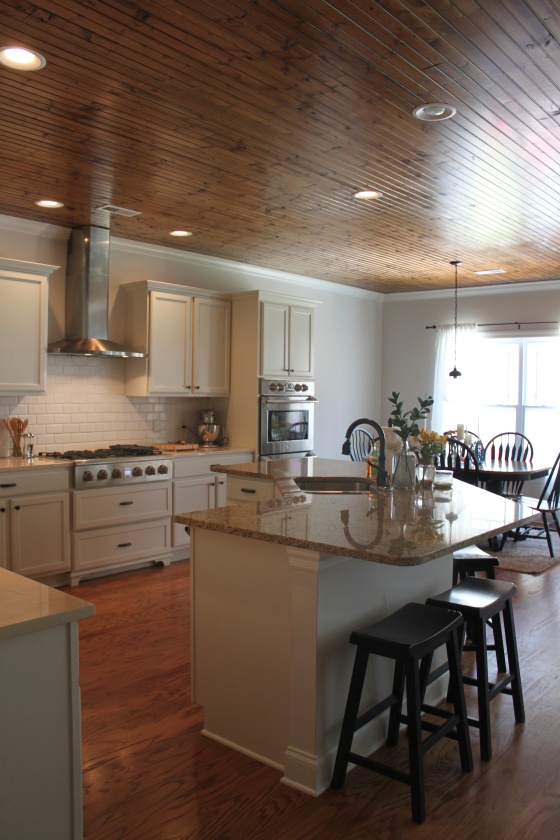
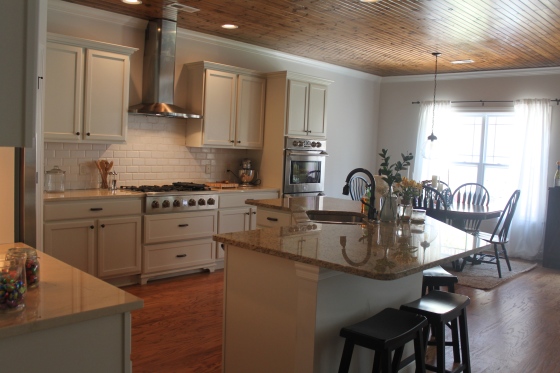
The one room in our new house that I have been struggling to finish is the kitchen.  It was so far from what I had originally visualized for our new space that I had a really hard time pulling it together in my mind.

I blogged in a previous post about all of the structural changes that we made and touched on the internal battle I was having about a tile backsplash.

After months of looking at an unfinished space, I had finally reached my designer breaking point and knew it was time to just suck it up, realize it was not a stark white kitchen and finish the damn thing.

So after months and months of looking at tile, stressing over tile and hating tile, I decided to go a slightly different route.

For those who know me well, you know that I have a not so slight obsession with painted brick. I drool over exteriors that are painted brick and dream of a large painted brick fireplace.

Because our new home is much more “rustic” in style than I had planned for, what better place to add a touch of architectural interest than in my kitchen backsplash! Bringing something that I always loved about  Highland Park to our new construction!

Because I didn’t want to tear out the existing tile (well I did until I tried to remove a few tiles and realized that we would be looking at a pretty major sheet rock job) I decided to “brick the tiles” that were already in place and finish the tile work from where we had added  and moved cabinets.  I did the tile work myself and it was fairly simple. My $19 tile cutter from Home Depot is my new BFF.  I then used grout on top of the existing tile to create a “rough brick-like finish.”  I also added mortar to the original grout line to add some character. I didn’t want anything about this project to be perfect.  Pretty hard for a type A personality but the end result was exactly what I wanted. There are rough patches and it looks almost exactly like the exterior brick I have always dreamed of painting.

To paint the “brick” I used a bonding primer and then a high gloss paint in the same color as my walls.  It went on quickly and without too much effort. I opted for a brush instead of a roller.  It took longer but I wanted the brush lines to add dimension.

I am very pleased with the end result and glad that I decided to go this route.  I think it is a perfect addition to the stained ceiling, Crema Marfil marble and the future rustic island countertop.  It also only cost around $200 for the entire tile to brick project so I am hoping Brendan will be so impressed with the money that I saved that he will let me shop for a new awesome sink when the countertop goes in.

After all this time the kitchen is still only about 95% there…but at least it appears finished to the normal eye.  I still have pendants to hang, the island to finish and a few wood details to go in but at least I don’t have to crop it out of pictures anymore!

IMG_7925

IMG_7924

IMG_7920

IMG_7921

A minor turned major kitchen redo


We are getting close to being finished (for now) with the house.  The last major piece of the puzzle is our kitchen. 

When we decided to purchase this home instead of building a new home we had to make a decision about our appliances.  

Last April, Brendan and I made a random Sears stop one afternoon so that he could stalk the TV he had been dreaming of for about two years (the TV that now hangs over our fireplace so don’t say I won’t compromise!)  While he was looking at TVs, I ventured over to the appliance section. I was admiring the double wall ovens and a particular “commercial style Kenmore set” when the sales person informed me that all wall ovens were 50% off.  Brendan and I talked about it over the next few days and decided to go ahead and act on the wall ovens because it was too good of a deal to pass up. I left the house one Saturday morning to prepare for Porter’s birthday party and when I returned..Brendan proudly announced that he not only purchased the wall ovens…he purchased the 36″ slide-in cooktop and dishwasher as well. I literally almost fainted. After regaining my composure, he told me that he basically got the entire package more than half off and it was just too good to miss out on.  So we had appliances..but no kitchen to put them in. 

I have literally built every kitchen design around the appliance specs so when we decided to purchase a home with a standard kitchen setup for a 30″ freestanding range and cabinet mount microwave..we had to develop a plan. 

We talked about it for weeks (fortunately we had all the time in the world thanks to the real-estate nightmare) and decided we could either reconfigure the kitchen to fit the appliances we had purchased or we could return the appliances to Sears and purchase standard size appliances that would work with the existing kitchen. 

We contacted our good friend Andy at Against the Grain Custom Woodworks and ran our ideas past him. We knew that having custom cabinets created to fit the cooktop and double ovens would be tricky and that he was the very best.  I am so crazy about things matching perfectly and I wouldn’t have trusted anyone else with this job.  He really is that good at what he does. 

After running numbers we both realized that it was just too important to us to have more of a “wow” kitchen than what was installed so we cut corners in other areas to plan for the renovation. 

I have said over and over that I refused to have granite in my next kitchen (and of course this kitchen has granite) so I had to realize that it was something we would just need to live with for a while. 


A little electrical wiring changes..a gas line installed and Andy working his magic with the cabinets ( you literally cannot tell the difference between them) and we had an “almost there” kitchen.  Until the appliances were installed…and the granite didn’t fit back. Oops. 

So we ran numbers and decided on Crema Marfil marble for the perimeter and left the granite on the giant center island until we can swing the change. 

Now all that is left to figure out is the backsplash. The current backsplash has a little too much pattern and color for my taste.  I like clean simple and monochromatic.  Plus..we decided on the industrial stainless range hood and with the tongue and groove wood ceilings I just worry that pattern will be too busy and one of those spaces overwhelmed with “eye catchers.”  I had originally planned to do a simple subway tile but the white is too stark for my kitchen cabinets and countertop. So I have been stuck.  For weeks.  

Let’s take a look  at my design boards and get some thoughts:

Image

This design board features a cream glass tile.  I love glass tile..I really do…but I worry that the light color will reflect a weird shade (for example the white glass looked green on the wall) and that it is too “glam” for the more rustic french country inspired space.


Image

This board features a tile from Shaw’s new line.  It is linear randoms and I think the shape with minimal color would be really interesting.  I would want to take this all the way to the ceiling behind the range hood.  My concerns with this one is that the tile in person has more gray than brown and seems slightly cold. 

Image

The final board keeps the original tile and we just paint it a color similar to my wall color.  It is the most cost effective and would have minimal demo.  We would only need to finish the existing tile to suit the new layouts and replace a few “cut” tile pieces. I also think it would be really beautiful and simple.  Two things I like. My concern here is that we have spent so much time, money and effort trying to create a more “custom” kitchen..I don’t want to cheapen it with cutting corners and painting a tile. 

Alright!  I am ready for feedback so that I can finally get this project finished and show you my kitchen!

A finished dining room

Here it is…our first “finished” room in our new house!

The dining room had to be completed immediately.  It is the first room you see when you walk into our house and there is really no hiding it. Not that I would want to anyway. We have even used it twice in three months!  At this rate…it will be the pristine entry piece I have imagined forever!

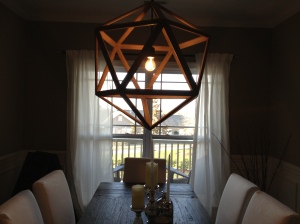
The light fixture is my favorite design element in the space and was well worth the ridiculous shipping charges.  The table is heavy and rustic and the chairs are extremely practical.  We have actually had red wine spilled (and not noticed for two weeks) on a chair and it washed out completely!

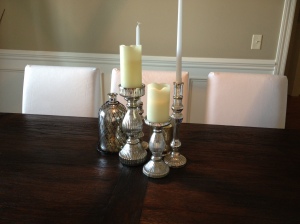
I accessorized with a seagrass rug, a few mercury glass candle holders, simple white curtains, a more modern than I am used to curtain rod and  red branches in a clear glass vase. I wanted a punch of color and for now, the red branches are all I have figured out.

What I want to add….after seeing this space for a few months I have some ideas of “tweaks” to the current design as well as my original board.

We purchased a buffet for this space but after getting all of the furniture in realized it would make it seem very tight. We wanted this space to be extremely clean and simple and not overwhelmed by furniture.

I have my heart set on a piece of artwork for the dining room from a local artist in Chattanooga. She creates amazing oil paintings and I am saving my pennies and hinting for birthdays that this is what I need.  I want a canoe painting.  A simple…beautiful…canoe. I think it will add the perfect amount of color and interest to the space and I can’t think of a better piece  to grace my dining wall. Here is the link so you can check out her site:

http://carylonkillebrew.com/html/current-canoes.html

So the last piece of my design puzzle is the chairs at the head of the table.  I am torn between the simple white chairs and possibly adding a more substantial chair with a pattern, color or texture.  Brendan prefers the look of the all white chair but I am not convinced.  I try to be for his sake..but I’m not.

So are you ready to check it out? Let me know what you think!

In case you haven’t seen my previous posts..here is the design board for our dining room:

Brendan and Ashley- Dining Room

And here is the “finished” space:
IMG_2603

IMG_2604

IMG_2609

IMG_2608

IMG_2607

IMG_2606

IMG_2605

Home Sweet (finally) Home

After about three months of real estate nightmare… we have finally closed on both houses and are somewhat settled into our new home.  It has been quite the process and we have had more stress in the past three months than ever before. If we were able to make it through this…I honestly think we can make it through anything!

Now that I feel like I can breathe again, I plan on sharing my idea boards for the rest of the house and then sharing the actual space!  We are about 90 percent there (for now) and feel extremely blessed to finally be home!

I thought I would take the time to share the top 10 things that I have learned throughout three months of real estate drama.

1. When “destiny” comes knocking at your door…please realize that even though fate may be pushing you in a new direction…you may have to jump over hurdles, bend over backwards and take a few kicks in the rear before you actually get there.

2. NEVER move yourself (mentally or physically) into the new home before you know every detail of the old home’s transactions.  We found ourself in a very sticky situation where not only had we fallen in love with our new home..but our kids had too.  Talk about stress trying to keep everyone’s dreams alive throughout the not so simple sale of our old home.

3. Bridges were made to be fixed and crossed over again.  The surprising twist to this story is that we purchased a new home from my previous employer and they were pretty amazing throughout the entire process.  Three years later and they still considered me part of their family.  A  definite “bright spot.”

4. If you plan to live in a home for a long time and have “hoarding tendencies” (me) your money is WELL SPENT hiring a junk removal service to make it all disappear.

5.  Movers are necessary.  Unless you actually like to torture yourself…then have at it.  But if you like watching other people break their back over your ridiculously heavy antique baby grande instead of actually breaking your back (and possibly the piano) then spend the money and let someone do it for you.

6. You are more handy than you think.  Well..not me (I knew I was handy)…but Brendan is more handy than I thought.  In the eight years that we have been married he has gone from “call your dad” to” Mr. Light Hanger of the year!”

7.  If you don’t plan on using it…get rid of it.  Who wants a new house full of stuff that will never be used?  Not me and you shouldn’t either.

8. Pick your biggest “I have to have it” project and then plan your budget around it.  We had already purchased appliances so in order to use them we knew that  we would have to reconfigure the existing kitchen. So we made sure to pre-budget for that project and then made cuts elsewhere.  It is much easier to buy additional lamps and accessories than it is to add cabinets later on.

9. A plan makes it easier.  I took the time to create design boards, shopping/materials lists and drawings for every room in our new house.  Coming into the move extremely prepared, I was able to move and setup a house in less than three weeks…and be ready to host an engagement party. Insane? Yes.  Worth it? Absolutely.

10.  The most important thing I learned through all of this is that houses may come and go..but your family is home as long as you are together no matter the what address may be.

A family friendly all white family room.

Since there is very little I can control at this point about our appraisal that seems to be dragging on…and on….and on…. I am going to move forward in my mind with new home design.  I do well when I focus my attention back to something that I can control (this all goes along with my OCD tendencies) so play along folks.

Straight back from the main entrance is the family room.  It is a large space that opens into the kitchen and breakfast nook.  Almost the exact layout we have been dreaming of.  The family room’s main focal point is a large (and I do mean large) stone fireplace.  Not exactly my “cup of tea” so I had to really think about a way to create my vision of a  simple, elegant  space while incorporating this massive fireplace. Anything too much and the space will be overwhelmed.  I also prefer glam over rustic so this  proved to be a challenge in my mind.  I just try to take myself to a french farmhouse with beautiful rustic original fixtures and the modern elegance of a Paris flat and all is well in my world. Yes…that is a white sofa…yes I have three kids…and no I am (probably) not crazy. I have dreamed of all white in my living space.  The color soothes me and the “clean look” makes me extremely giddy.  White can brighten and warm at the change of a simple pillow.  I can take this room from neutral to glam with a few inexpensive textile changes.  It is classic and simple and I AM DOING IT.  The sofa, white chairs (there will be two) and ottoman all have removable and machine washable slipcovers.  Easy to clean and easy to replace.  The pillows that I will start with will be a mix of white, natural and maybe a hint of dark grayish brown(if I can find them in my storage building.)  For now I am not going to add any pops of color to the textiles but the beauty of the all white furnishings is that anything is possible in the future!

The room will be grounded with a custom Shaw  rug (made from a cut of carpet and bound.)  This gives me the flexibility to select the size and the cost is a fraction of the cost of a pre-cut area rug while having the durability and stain resistance of carpet.   I need this rug to be big (probably 12X18) because there are no existing floor outlets and my furniture and tables will “float” in the middle of the room.  I will use some  tricks of the design trade I have learned to run an electrical grid of the most complex pattern under this rug and no one (unless you read my blog) will ever know they are there.  It will just be “magic light.”

In keeping with my white theme, simple white curtains will hang on the four windows along the back wall and continue into the breakfast nook for consistency.  Actually, these same simple white curtains (an inexpensive IKEA find) will hang throughout my entire house.

One of my biggest issues with the house now is the lighting.  It just isn’t my style.  The current light fixture in the family room is a ceiling fan.  I am not a huge fan of ceiling fans and will only use them when completely necessary.  This space is not one of those.  I always think of light fixtures as the great oversized necklace that makes your basic teeshirt amazing.  Ceiling fans are more like a thin chain that no one really notices. The round iron light fixture above gives the hint of “french farmhouse” that I mentioned before and  ties nicely with the rustic fireplace.  I will add amber glass lamps for additional lighting and more of a glam flare.

The coffee table was a Southeastern Salvage find and I have stored it for over a year in hopes of using it.  It has an awesome chrome base with a beautiful unfinished wood top.  Two small metal end tables will flank the sofa and a recent trip to Bassett’s clearance room provided me with an super chic chrome sofa table for a mere $40!

My original thought was to add two chairs to the staircase wall for additional seating an a “reading nook” (yeah right…like I have time to sit and read) but on the same Bassett visit I found this beautiful light gray club chair and thought that pairing it with a ceramic table would be a nice classic touch.

My accessories will be mixes of silver, mercury glass and white and there will be an abundance of candles (flameless, of course.)  I have even planned my Christmas tree and mantle decorations and they will follow the same theme.  Every detail counts.

Now for the biggest challenge.  The piano.  In our current house, we have a room that houses my beautiful baby grand piano.  The new house does not.  I am going to do my best to squeeze it into the family room but I am not willing to sacrifice the entire space for the sake of a piano that I rarely have enough time to play anymore.  It is a sentimental piece and makes a great spot for my Christmas Silhouettes so we will just have to see how great my space planning is when we get there.  On paper…it works…but barely.  We will just have to see what “in person” looks like.

In case you are wondering why I haven’t picked some breathtaking artwork or large mirror for over the fireplace…that’s because as much as I would like to use it my husband has plans for a giant TV to hang.  Lucky me. My only rule is that no wires are visible.  Our current house looks like a flashback from “A Christmas Story.”  I also like that this puts a little pressure on him to think about design details.  Of course, after he visits Smarthomes and my furnishings budget becomes non-exsistent I may rethink this decision.

So that’s our family room!  As long as all goes well.  It may not seem like the most practical space to live in but I can guarantee that just as much football will be watched on this couch as our last and I will not cringe anymore than I already do when things are spilled!  Hey….it just gives me a reason to make changes!

A “not so formal” dining room

The second appraisal was a little while ago so everyone keep their fingers crossed!  I also heard rumor that we are still hoping to move next week (out by TUESDAY) so you may also want to send support, encouragement and love to Brendan as I will be a bit “hard to handle” for the next few weeks.

So since we may be moving sooner rather than later..I want to dive right into the inside of the house and share my design boards.  I am hoping that this will bring some clarity to the exterior home debacle because I seem to be on a constant spin cycle of what I am thinking.

When you enter the foyer the first room that you see on the left is the dining room.  I REFUSE to use the term “formal” because our lifestyle is anything but.  We have three kids and entertain a lot (which both typically involve red wine) and those two things do not mix anywhere in a “formal” house.  While you all may think some of my choices are crazy for our lifestyle, please know in advance that I have thought it through over and over again and chosen only things that can be easily replaced or washed quickly.  No dry-cleaning for us!

I want to create a warm and inviting space in our dining room while keeping it simple.   I don’t dream about art or wall hangings…I dream of finding the perfect light fixture to “entertain” your eye.  I want to mix white (machine washable) slipcovered dining chairs with a heavy, rustic table.  I want it to be a space that you  sit in for long dinner conversations and feel comfortable .  Slouch in your seat…spill  your drink…break table manners.  It’s ok.  We won’t judge.  Just talk about my awesome antique store finds are and we will be fine!


The paint color is the existing color chosen by the builder’s designer.  It is a warm taupe/gray (depending on the light) and I can live with it.  The wainscoting is bright gloss white and I like the warmth that the color brings to the space.  My dream table is from Restoration Hardware.  I would be tempted to spend the $4000 to buy it (not really) ..if I hadn’t found a very close “look a like” at World Market for closer to $500 (with one of their awesome furniture sales!)  I have debated white slipcovered chairs a lot.  Having three kids makes it seem like a really bad idea but I love the look.  The chairs shown are from IKEA and are a mere $89 a piece (including the slipcover.)  Because I want a cover to the ground..I just don’t see the point in paying almost triple that for something from Pottery Barn or Ballard.  Not to mention, their slipcovers are dry-clean only and the ones from IKEA are machine washable and only $40 to replace if something really bad happens.  The “china cabinet/bookcase” is my splurge in this room and the reason I am so frugal in other places.  It is rustic black…from Restoration Hardware…gorgeous and ridiculously expensive. I will be making that purchase at a later date in hopes that I find an affordable alternate before I do. I will probably just have  a custom piece  built by our amazing neighbor in lieu of the RH piece.  He is incredibly talented and I will be giving him lots of props for the kitchen re-do at a later date.  I know that I can show him this picture (hint, hint Andy) and he will make something even better! Check out his work at http://www.atgcustom.com/

The rug is a natural grass rug (also from IKEA and an unbeatable price at $99) and will bring a natural element to the space.  When choosing to use a natural rug in a dining room…beware that spills are not easily (if ever) cleaned off.  I am willing to gamble with this one but because of the use in the dining room I wanted to find something inexpensive so that will not gag when it gets ruined and the IKEA rug does look  great in person.

I did a show for Mohawk last year and the theme of one of my vignettes was “recycled.”  I found the coolest mirror made out of recycled railroad ties and I plan to lean it against the smaller wall in this space.  It is a definite “conversation piece.” I also have a wine rack made from reclaimed ship’s wood and hope to find a corner to stick it in as well. That’s my idea of artwork.  A mirror and a place to store wine.  Perfection!

The china is our wedding china and I will keep the table linens simple and in a natural linen with white monogram.  I mean after all, I am southern and know every good space has “ownership” with your monogram. I have a hodgepodge of mercury glass candle holders to decorate the table and a will use  a bunch of fresh lavender in a simple white vase to add the only punch of color in this room.

The white curtains will dress the windows and keep the look simple and clean. I plan on visiting my favorite antique stores (http://www.merchantsonmain.co/ and http://www.knittingmillantiques.com/) in search of a mix of unique pottery and vases to go on top of the china cabinet that I add later.

Now I have saved my favorite part for last.  The light fixtures in the house currently are heavy and large and not my style at all.  I knew immediately that I would be swapping 90% of them out for something more our suitable to our designs.   I wanted to find something that would really add interest to my monochromatic natural space while maintaining my overall natural theme.  If you don’t know already…two of my favorite things are a great sale and an interesting piece.  After days of searching, I hit the jackpot with this light fixture.  It is a wood polyhedron pendant from Restoration Hardware and was 1/2 off!  They have these in three different sizes and we decided to go with the 24″ medium for fear that the 32″ large pendant would be a little “too much.” I do worry that the single light bulb may not be enough so be prepared for lots of candellight dinners at our new house. Fortunately, thanks to flameless candles that shouldn’t be a problem.

Let me know when  you can come over for  dinner!  I will try to work on my cooking skills before then so hopefully you will enjoy the food as much as the space!

Drumroll please……

Image

Here it is!  Our (probably) soon to be new house!
For those of you who have followed my vision and ideas for a while…you will realize this is NOTHING like our original plan.  I love white, white and gray and as we can all see, this is a much deeper color palate.
Was it love at first sight?  Not so much…but I do see great potential and know that it is going to be a great place to raise our (not so little) family.
The house is located in a neighborhood called Reunion which was developed by my former employer Pratt and Associates. You can find details about the styling and design behind Reunion here:
Brendan and I looked at Reunion when we first moved to Chattanooga 5 years ago.  We loved the neighborhood and the style of homes and felt like it offered the charm and character of a historical neighborhood while having new construction.  The neighborhood was slightly out of our reach at that time but it remained in the back of our mind while going through the home process.
The neighborhood has a great “community vibe” and it looks like something out of a movie during a Sunday drive.  Families raking leaves, children riding bikes, nothing out of place and not a crackhead in sight!  HOORAY!  We also love the convenience to shopping (my Pure Barre addiction is less the THREE MINUTES AWAY) and the slightly shorter commute for Brendan.  Both big pluses!
One of the biggest drawbacks (for us) in the original portion of the neighborhood were the barely there yards.  Five years ago it was hard enough to imagine such a small space but after another child and two large dogs adding to our family…it would never workout.  The great news about this house is that it is one of the “estate lots” and the approximate dimensions are 100X300.  That’s PLENTY for us and fortunately we aren’t responsible for keeping up with very much of it.  We have a lot of privacy behind with woods and no one will ever build directly to our right.  No more “awkward” eye contact from the kitchen sink with neighbors as you are both staring into space!
The home is a prefinished James Hardie product in a dark blue shade.  Similar to our current home with less gray.  Because a “craftsman” style has never been my dream home…I am determined to take this exterior to more of a “coastal cottage” styling.  The dark brown gutters are an interesting addition to the exterior but limit my ability to pull the gray tones that I love so much.  I am thinking about changing the “reddish/orange” front door immediately.  Red is probably my least favorite “personal color” and I can’t imagine being happy walking up to it every day.
Here are my ideas:
In this design board, I add a pop of color and a touch of coastal with a coral front door.  Funky patterened  pillows add plenty of interest and the classic bronze planters with topiaries bring a touch of traditional. Yes and Brendan is totally fine with a “pink” front door so no need to worry about that!
This  idea board keeps the color scheme simple and rich.  Changing the front door to dark brown while adding crisp white chairs, classic white planters and personalized accessories will make for a traditional look without seeming stuffy.
I know, I know.  I have said a million times that I am SO OVER the blue/green and brown combo but there is something about this mix that I love.  It is so charming and cottage like and I think that the pale blue door would be totally unexpected.  “Shabby” planters will soften the porch and a touch of yellow will create an eclectic mix of front porch charm.
While yellow is not one of typical “go to colors,”  I love pairing navy and yellow together.  Especially in this mix.  The yellow front door is soft and creamy and the patterned pillows paired with a personalized pillow will make this porch inviting. Reclaimed planters  (this will be a great project for my dad using reclaimed barn wood from my grandparent’s house) with a funky knocker to accessorize the look will flank the front door with house short topiaries to bring a classic feel.
This board (a 2:00 AM thought) features the current door color (in my best guess) with accents.  Brendan says he likes the current door color so I thought I should give it a shot.  I mean, as an Auburn girl shouldn’t I LOVE the idea of an “almost burnt orange” and navy color scheme?  I do love the classic red and blue scheme with a bit of a punch with the orange hues. I just worry that it really makes the house more “craftsman” than I can handle.
So those are my thoughts!  I am craving feedback on this so please give me your opinions!

Superstition

It has been a while since my last post and there are legit reasons for that.

As if keeping up with three very active kids isn’t enough, we have been in home turmoil.  What else is new, right?

I have been waiting to blog about this ongoing process because I didn’t want to “jinx” anything.  I am superstitious like a 40 year old NFL player.  I run the scenarios in my head of changing up anything and messing with the outcome.  Fortunately, it typically includes not talking about it (especially on my blog) or shopping before everything is set-in-stone and not things like wearing the same socks and underwear. Because we are finally coming to a point that seems like this is actually going to work out…I am throwing caution to the wind and filling in the blog blanks of the past few months.  Now if something happens tomorrow to make this all fall through…I will know my need to blog was to blame.

Just when Brendan and I had given up on ever leaving 1503 Chamberlain Avenue, fate came knocking at the door.  Literally.

We had decided that we could not possibly go through the home selling (and in our case NOT selling) process for one more second.  We have been back and forth and back and forth (repeat this cycle for three years) on what to do..where to go…or what to do with this house if we stayed.  We had started the process of moving on with a major home renovation and had recently met with an architect to take my drawings to a historically accurate and well thought through place.

Then, one Monday morning, I got a call from Elizabeth telling me that the same buyers who had been asking to look at our house for a few weeks were still very interested in seeing it.  Brendan and I had kind of “blown them off” in hopes that we would be spared the agony of another full day of deep cleaning only to hear nothing back or get a ridiculously low offer. We told Elizabeth that they could look and made plans to schedule something for later that week.

A few hours later I had a knock at the door.  A young man was there and expressed his interest  in our house.  He told me that his realtor had been trying to set up a tour but had been unsuccessful.  Fortunately I knew some details about their previous home sale and could give him the “you are who you say you are test” and before I knew it…I was allowing a stranger to tour my home that was NOT perfectly clean and had laundry spread around the dining room table.

I fully expected this to end our dealings and thought that I could at least go back to my renovation plans. I was wrong.  He asked to bring his wife back that evening and after she toured the home we learned that there would be an offer.  A FULL PRICE OFFER.  Three years after first thinking about leaving and we had exactly what we wanted.  Kind. Of.

So we frantically started the search for a new home.  A new home we had been thinking about BUILDING for three years. In case you don’t know what this means for a designer…it means all of your years of imagining a home a certain way (down to your Christmas decorations) is officially out the window.  You have to start completely over…compromise and be excited?  Easier said than done.

We decided (due to my ongoing medical drama) that building was not the best option at this time.  We really wanted to move our family immediately into a new home in case I go back into treatment or have to leave Chattanooga for further treatment.  We looked at three houses and decided.

We are moving to an area a little closer to the kids constant activities, a little closer to Brendan’s job and a LOT more “suburban safe.”  Brendan and I discussed other historical/transitional neighborhoods and realized that we were still shopping for ourselves and not our kids best interest.  We both grew up riding our bicycles to friends houses and having free reign  of our neighborhoods.  We wanted the same for the kids.

We found a new construction in a neo-traditional neighborhood that we have always loved and feel like we have found the best of both worlds.  The curb appeal of our historical neighborhood in a well planned and safe area.  The home is large enough for our family to spread out a bit and the builder (my former employer) has been awesome in agreeing to paint to my specifications and install a gas line.  We can pretty much move right in and the only rooms that will require my attention are the kids bedrooms, light fixture swapping  (and replacing) and a semi-major kitchen reconfiguration.

Am I completely blown out of the water with the house?  No.  Do I spend hours upon hours thinking of how to change it to make it as close to perfect as I can?  Yes.  Have I had to COMPLETELY change in my mind what I have assumed we would have for the past three years?  ABSOLUTELY!  But..at the end of the day…that’s what I do..and I know I can do it well and on a very tight budget.

Seems like a perfect story!  Boy meets house…boy introduces wife to house…they make offer…family finds new house.  I WISH IT WERE THAT SIMPLE!

As in most transactions in a historical neighborhood when you are trying to get top dollar and keep your losses to a minimum…we have had a major issue with the appraisal.  The comps were not comparable (story of our life) and his bottom dollar was ridiculously low.  This is common in my neighborhood when dealing with unfamiliar people to the area who form preconceived ideas before ever stepping foot in our home. Even the lender thought his appraisal was too low…but unfortunately their company will not order a second appraisal and the appraiser would not budge. Fortunately, our lender is amazing and is now working  with our buyer.  We feel like this is actually going to happen (after three weeks of appraisal frustration) and that is why I feel like I can share!

Maybe I am breaking the rules of superstition but I just can’t keep the stress bottled up anymore! Get ready to be overwhelmed with my overwhelming task of creating my dream home in the new house!

A Photographer’s Studio

My sister-in-law, Kelley is an awesome photographer in Virginia Beach.  Check out her website if you don’t believe me. www.kelleystinsonphotography.com

She asked me a few weeks ago if I could help her create a space for both she and her clients to enjoy.  I was more than happy to help so here we go!

Kelley is the wife of a Navy pilot and mother to my two adorable nephews.  As if that isn’t a full time job in itself, she has also built a successful and constantly expanding photography business.  Kelley is passionate about photography.  I am sure she cringes when I shoot with my flash, don’t adjust settings (I had her do that for me when I bought the camera three years ago and have left it since) and depend on my computer to correct my poor lighting choices.

Kelley has great creativity, patience for her subjects and a huge heart.  She donates her time and services to Operation Love Reunited for other military families and helps them capture special family moments for their loved ones knowing that it could possibly be their last chance.

She edits photos, sets up adorable newborn sessions, entertains clients and  dreams up new and better prop ideas all from her home. A home filled with two boys, a zillion tiny cars, a husband, and a dog. YIKES!

So here is our challenge:

Creating a space that serves not only as her working office but as a waiting area for her clients.

The issues:

The room is 13X13 with a window bump out and two wide openings.  That doesn’t leave a ton of space for all things that are needed.

The fun part:

Kelley wanted to create something chic with a touch of both modern and vintage.  A place where she can work and host that sparks her creative juices.

What I created:

Kelley’s room is painted a light blue/gray with dark wood floors.  She will use a black china cabinet that she owns for storage.  She loved the idea of a sawhorse desk with baskets and wanted to use a console table as office storage with a gallery of her art above it.  She wants a bookcase to provide storage and house tv equipment and a seating area for clients that feels cozy and comfortable. For the furniture, I suggest a mixture of white and black for glam with a touch of modern. Flanking the black china cabinet and black bookcase on either side of the main opening from the foyer and using a white desk and console table gives you the sense of walking into a well coordinated space with “hidden” storage options (a great idea unless you plan to keep your storage options organized and perfect every minute.)  A white small sofa will be tuck perfectly in the window bump out and allow room for a white coffee table without taking up the entire space and still makes walking around easy . I selected a white upholstered chair with black frame to tie both furniture colors together and add interest behind an all white desk.

Kelley loves the color of her walls (and I do to) so we decided to find a fun “pop” color to use with the light blue/gray. Yellow is a great option and can both brightness and whimsey to the space. I suggested yellow and white zig-zag pillows (or any other funky pattern,) solid yellow pillows for a background to the white couch, a black/yellow/white patterned pillow to coordinate all colors and a whimsical pillow that says “smile” to add a fun element to the fact that it is her photography studio. A white shag rug will define the waiting area and  black and white patterned curtains will frame the space. Curtain hardware such as glamorous finials and curtain rings will add a funky decorative touch.

Accessories should be minimal and feel connected to the space.  Black and white candle holders on the coffee table  with a black portfolio of work, an acrylic lamp with yellow shade, and yellow candle holders (or vases) on the console.  Minimal, modern, clean and fresh. I suggest one major pop of color (and not the colors used previously) on the desk or coffee table with bright pink flowers in a glass or white vase.

Office essentials can be easily hidden in black baskets, boxes and white magazine holders. Teal or yellow ribbed glass lanterns would be perfect for loose office materials and add additional pops of color throughout the space.

The main focus of the space is her beautiful art. Kelley wants to create a gallery wall of her work.  By using frames of all shapes and sizes and white photography ledges, it will take her clients a while to move past that wall and realize how fantastic the rest of the space is!

So that pretty much sums up the design.  I just can’t wait to see how she takes my suggestions and creates a space perfect for her!